CampHaven
10x10 ft Camping Tarp - Waterproof Hammock Rain Fly with 19 Tie-Down Points & Car Suction Cups 3000mm PU Ultralight Backpacking Shelter Heavy Duty Tent Tarp for SUV Hiking & Survival
10x10 ft Camping Tarp - Waterproof Hammock Rain Fly with 19 Tie-Down Points & Car Suction Cups 3000mm PU Ultralight Backpacking Shelter Heavy Duty Tent Tarp for SUV Hiking & Survival
Couldn't load pickup availability
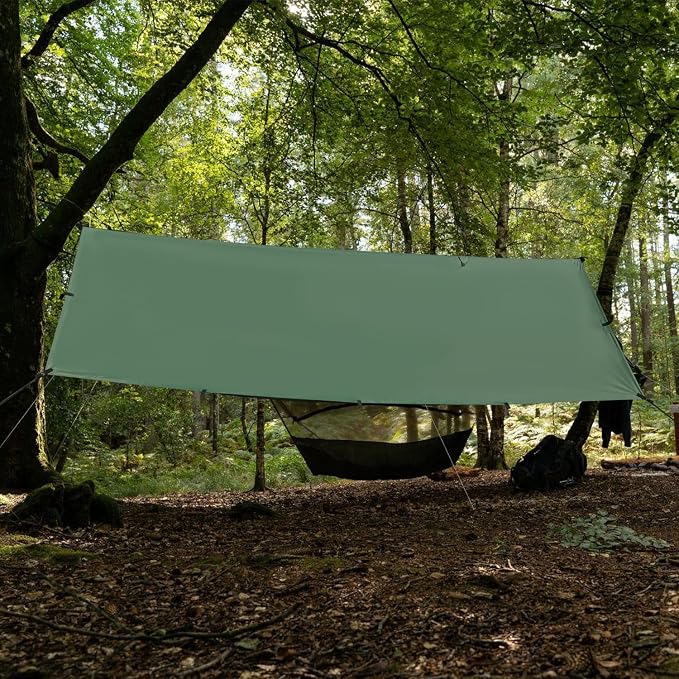
- ? INSTANT CAR SETUP:Stop settling for basic tent tarps. Our upgraded 10x10 ft shelter features 19 reinforced tie-down points for endless configurations.UNIQUE ADD-ON: We’ve included 3 heavy-duty car suction cups, allowing you to instantly attach the hammock rain tarp to your vehicle’s roof or windows. Perfect for car camping (overlanding), hammock setups, or standalone A-frame shelters. (Note: Tarp Poles not included). - ? 3000MM WATERPROOF & Tear-resistant:Engineered for the harshest elements, our waterproof tarp is crafted from premium 210T ripstop polyester with a 3000mm PU waterproof rating. Featuring double-stitched taped seams and heat-sealing technology, it provides a leakproof barrier against heavy rain, thunderstorms, and snow. Stay shaded and safe with built-in UV protection during scorching summer days. - ? ULTRALIGHT 24 OZ& COMPACT FOR BACKPACKERS:Performance meets portability. Weighing only 1.5 lbs (24 oz), the AVOFOREST backpacking tarp is lighter than most leading standard tarps without sacrificing durability. It folds down effortlessly into two included storage bags (large & small), making it an essential, space-saving addition to your backpacking gear, hiking kit, or emergency go-bag. - ? READY-TO-USE PREMIUM ACCESSORY KIT:Get everything you need in one go!our kit includes: 1x Waterproof Camping Tarp, 6x Aluminum Stakes, 6x Reflective Nylon Ropes with tensioners, and 3x Strong Suction Cups. The specialized guyline adjusters ensure a rock-solid pitch even in high winds, while the suction cups offer flexible mounting on glass or metal surfaces. - ? OUTDOOR EXPERTISE:Choose a brand designed by engineers who actually hike. Every AVOFOREST traveling awning undergoes rigorous abrasion and tear-resistance testing to ensure it survives the wild. As long as you have any questions, you are welcome to n0tices us at any time.
Product description
Stealth Mode ? Maximum Privacy
Note: One tent pole is required for setup (not included tarp pole)
Manta Mode ? Maximum Living Space
Requirement: Four tent poles (not included tarp pole)
Wall Configuration ? High-Wind Resistance
Requirement: Four tent poles (not included tarp pole)
Wedge Configuration ? Maximum Shade & Airflow
Requirement: Four tent poles (not included tarp pole)
Plus Configuration ? Superior Rain Shedding
Requirement: Three tent poles (not included tarp pole)
Basic Configuration ? Weather Protection
Requirement: Two tent poles (not included tarp pole)
Reinforced PE patch
Double-stitched and reinforced seams
19 reinforced tie-down points
6PCS Tent Stakes * Tent Ropes
First, identify the desired location for the tarp's apex. Insert the main pole and secure the structure using guy lines and stakes. Finally, anchor the entire perimeter of the tarp base to the ground.
This innovative configuration features a built-in, three-sided enclosure at the rear?perfect for stowing gear during the day. Meanwhile, the triple-open front design ensures exceptional airflow and ventilation throughout the shelter.
This setup is a modified version of the standard six-pole configuration, specifically engineered for high-wind environments. By removing the two windward support poles and pinning the fabric directly to the ground, you create a low-profile windbreak that significantly increases stability.
To set up, insert your poles into the center points of each of the four edges of the tarp. Tension the guy lines and stake them down securely. Repeat this process at each corner to finish the assembly and maximize your shaded area.
This setup utilizes two side poles and one taller center pole to create a steep pitch for better rain runoff. This design not only prevents water pooling but also increases interior headroom and improves overall ventilation.
This setup eliminates side poles in favor of a sloped-roof design using two main poles and guy lines. To begin, spread the tarp flat and position the main poles at the center points. Use two guy lines per pole, applying firm tension to keep them upright. Finally, attach guy lines to all four corners, staking them down at a sharp angle to complete the structure.
213123
Share